On W1FKF's recommendation, I recently bought a Mio C320 GPS.
I mainly bought it because it can easily be unlocked to be a Windows CE handheld PC.
It's small enough to fit comfortably in your shirt pocket.
You can play MP3's and Videos, open Office Documents, check Email, etc.
I'm using MioPocket for the Unlock, it has lots of useful freeware with it.
There's also a MioPocket Lite bare-bones unlock with much less freeware.
For about $100 for the GPS and another $50 for a WiFi SDIO card, you can have a lot of fun.
Here's some links to get you started.
73, Ron, WZ1V
Mio GPS Unlock and Related Links
compiled by: WZ1V at arrl-dot-net:
- GPSPassion Mio Forum
- Another unlock, links for adding speech and other maps
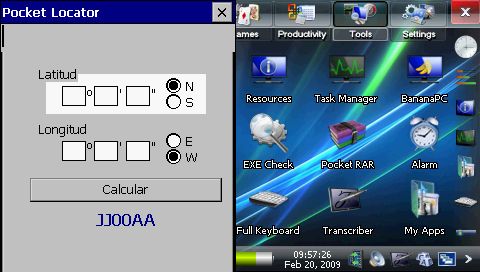
- Pocket Locator Lat-Long to gridsquare converter
- PeekPocket WiFI scanner
(click on any image to enlarge)
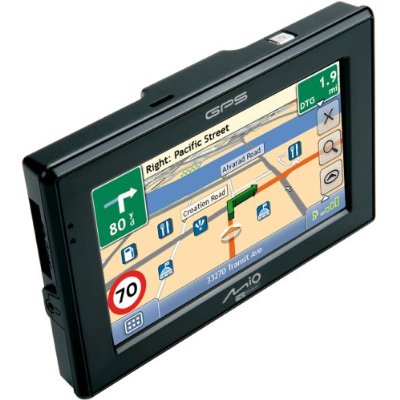
Left - Mio C320 GPS front view.
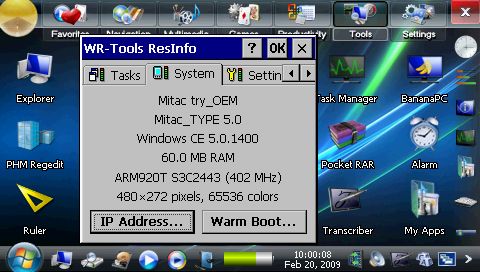
Right - Mio C320 unlocked, running Windows CE, and showing System Info.
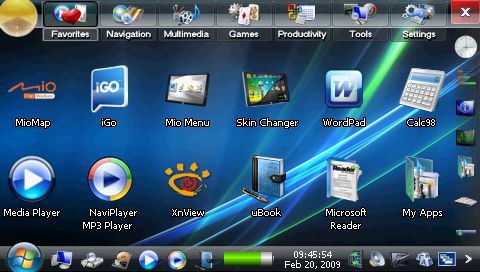
Left - One of several Desktops.
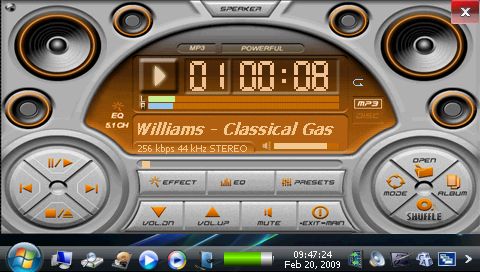
Right - Naviplayer MP3 Player.

Left - PeekPocket showing WiFi connection to a WPA secured Wireless Router.
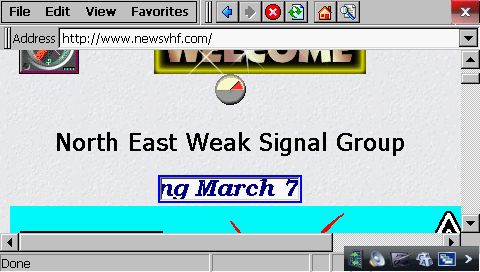
Right - Browsing the Web in Internet Explorer.
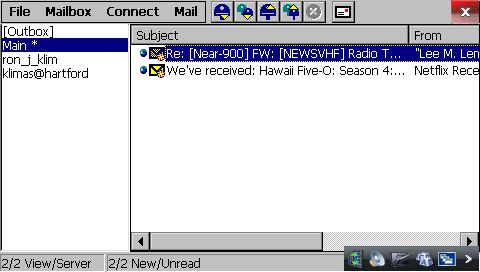
Left - Checking E-Mail with nPOPuk.
Right - Pocket Locator Lat/Long to grid square converter for Windows CE.
Here are some Tips for understanding the device:
Windows CE is in ROM. There is 1GB of Flash you can work with.
If you connect it powered up to a PC with a USB cable,
it appears as a USB flash drive on your PC, "Mio Device".
It is wise to backup all files and folders on this drive to your PC.
Make sure Windows Explorer on your PC is set to view Hidden, System files
so everything gets backed up.
This way if you mess things up, you can just delete everything,
and copy your backup files and folders back into the device.
Then, a hard Reset will reinitialize everything as it was.
Note: If all else fails you can reformat the internal flash drive.
If you do so, format it as FAT32 with a Volume Label of Mio Device
But first try this, while on a USB connection, click Properties of the drive,
then Tools, Check for errors to fix any issues.
The safest way to experiment is to do a SD memory card installation of MioPocket or MioPocket Lite.
That method leaves your internal flash drive un-touched.
But with this you'll only have Windows CE when you plug in your SD memory card.
If you want WiFi, you'll need to do a SD-Free installation of MioPocket or MioPocket Lite.
Meaning no SD memory card, all unlock code will be installed on the device internal flash.
This will require you to first move a bunch of maps from the internal flash into a SD memory card
(To make room for the Unlock code to reside on your internal flash drive).
I moved all states except a dozen on the East Coast out.
I placed the remaining states map files onto a SD memory card.
To do that, Create a MioMap folder on your SD card, create a Maps folder inside of that
(so that the path looks like \Storage Card\MioMap\Maps) and then move enough maps there
so that MioPocket will fit on the internal \My Flash Disk.
When I'm in the car, I plug in the SD card and have all 50 states.
When I want to browse the internet, I plug in my SDIO WiFi card.
I can only recommend 2 SDIO WiFi Cards for the Mio C320:
Ambeon WL54C-SD, or Spectec SDW-821. These are both 802.11g cards.
I have the Ambeon WL54C-SD, I paid $45 for it through Amazon.com.
It works on both MioPocket and MioPocket Lite since I debugged the registry
entries and sent the corrected code to the authors, which they now include.
If you start playing with the internal flash drive, you'll notice some oddities.
The root path structure shown on your PC's Windows Explorer during USB connection
differs from what appears on the devices's Windows Explorer CE.
It is the same content however, but appears differently as I will attempt to describe:
Paths shown under My Device during USB tranfer vs. Paths shown
while browsing My Device in Windows CE Explorer:
in Windows CE Explorer, the path \My Documents\MioAutoRun becomes
\My Flash Disk\MioAutoRun after you've explored into it.
If you add your own Programs to your Mio, and/or
You want to keep your Internet Explore favorites intact
(even after performing a hard reset),
Then copy any shortcut lnk's you've added from:
My Device\Windows\Programs
to:
\My Device\My Documents\MioAutoRun\Windows\Programs
(becomes \My Flash Disk\MioAutoRun\Windows\Programs after you've explored into it.)
copy My Device\Windows\Favorites entire folder
to:
\My Device\My Documents\MioAutoRun\Windows\
(becomes \My Flash Disk\MioAutoRun\Windows after you've explored into it.)
Note: Differences between Internet Explorer and Opera:
Internet Explorer uses the path My Device\Windows\Profiles\Guest
which contains the folders Cookies, History, and Temporary Internet Files.
These are flushed after a hard reset.
Opera stores it's bookmarks to My Device\Application Data\Opera\OPERA6.ADR
This is automatically retained (mirrored) in
\My Device\My Documents\MioAutoRun\Programs\Opera\Application Data\Opera\OPERA6.ADR
(becomes \My Flash Disk\MioAutoRun\Programs\Opera\Application Data\Opera\OPERA6.ADR
after you've explored into it.) This is why Opera bookmarks are retained after hard reset.
Opera uses \My Device\My Documents\MioAutoRun\Programs\Opera\CACHE4
(becomes \My Flash Disk\MioAutoRun\Programs\Opera\CACHE4
which accumulates junk so you may want to clear it's contents after awhile.
This may be cleared from within Opera, click Menu, Tools, Settings.
Opera History is stored in \My Device\My Documents\MioAutoRun\Programs\Opera\OPERA.DIR
(becomes \My Flash Disk\MioAutoRun\Programs\Opera\OPERA.DIR
Note: Every time after you run Windows Explorer CE, Internet Explorer
loses it's URL Launch Page, meaning you won't be able to browse anywhere.
This is an annoyance. But a Soft Reset remedies the problem.
ADVANCED TOPIC: Remote Control of your Mio on a PC or Laptop:
1. Copy file from Mio internal flash, \MioAutoRun\Programs\Win32\ASRDisp.exe to your PC's desktop.
2. Download and install Microsoft ActiveSync v4.5 for Windows on your PC.
Get ActiveSync for Windows 2000/2003/XP HERE
You'll need to reboot your PC to complete installation.
3. Go to MioPocket's Settings desktop, USB Mode, change to ActiveSync.
4. Connect Mio while powered up via USB cable to PC.
5. Answer No to ActiveSync setting up Partnership to synchronize.
6. ActiveSync will then connect device.
7. Run ASRDisp.exe that you earlier copied to your PC desktop. Ignore error, click OK.
8. You are now viewing your Mio desktop remotely on your PC, use PC mouse to control it.
You can also zoom 2X for a larger display if desired.
Breaking NEWS - I have PocketDOS working and booting FreeDOS.
At the meeting I demonstrated a well known MS-DOS program,
BD (Bearing Distance)
written for a PC 8086 running on the ARM processor of my Mio GPS.
Yes this means many of those old DOS ham programs can run on this device!
Get PocketDOS for Custom, OEM devices here
Note: The SETUP file doesn't work. You must manually install the .CAB files
per the install instructions text file.
Once you get wireless working,
Find free WiFi locations here
and here.
To replace the battery in your Mio with a fresh new one,
Read this.
...More info coming soon, check back later...
Questions? E-mail: WZ1V at arrl-dot-net
 Back to N.E.W.S. Home Page